|
|
Post by Tumbleweed on Nov 5, 2007 17:10:22 GMT -6
This topic has been split and titles edited accordingly. Building a ramp can be found here.As some of you know I am caring for my Mom who does use a walker to get around the house but anything more than that, she needs to go in a wheel chair. We needed a handicap ramp but the only logical place was to make a window into a door which would be a straight shot to a preexisting cement slab that used to be the foundation to an old falling apart addition to the garage, which I had torn down. The following posts will be the steps taken thus far and I will update with clickable links so you can see some photos of the progress. |
|
|
|
Post by Tumbleweed on Nov 6, 2007 1:50:12 GMT -6
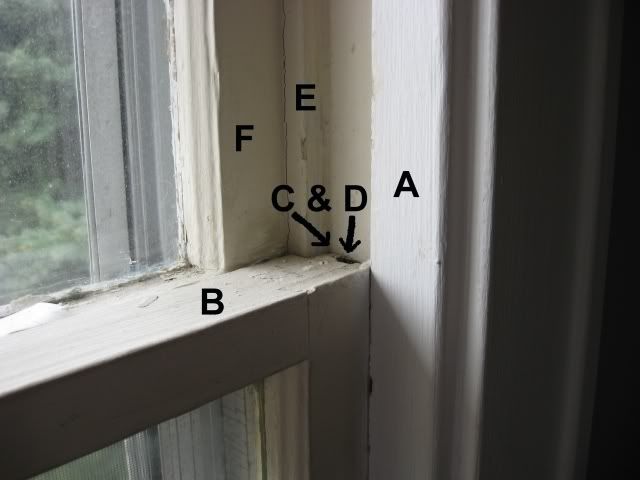
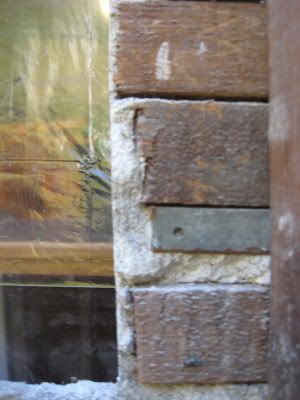
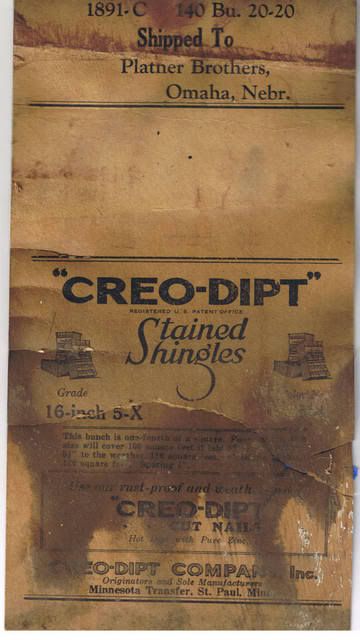
Editing in progress, adding more details and photos...remind me to edit offline next time. LOLBefore you get started on any project from an older home built prior to 1978, when lead paint was banned, I would suggest you put a drop cloth down, wear a mask and seal off the area if at all possible because you are very likely going to be kicking up lead paint dust. And just so you know what I am talking about here is the basics of a double hung sash window. You can click any of the pictures for a larger view.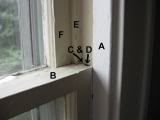  A = wood stop for lower window B = lower sash C = metal window track (your window may or may not have this) D = cords that are attached to the weights E = wood stop for upper window F = upper sash One of my goals was to try to keep the molding and all the parts that make up a sash window in tact so if any future owners wanted to reinstall the old window, they could. So taking off the trim had do be done carefully. I think everyone probably knows by putting a thick piece of cardboard or wood behind the prying part of the hammer will save whatever is behind it. Basic Steps for removing the window: Step One: Remove the wood stop (A) for the lower window. Run a sharp putty knife or utility knife to separate the paint from the stop and sash. Use a putty knife or flat screw driver to loosen the stop slowly moving up and down the stop. Step Two: Run the utility knife where ever you see paint may make the separation difficult. If you don't have a metal guide (B) for the window skip to step three. You are going to need to raise the window in order to get the metal track or guide out. Do not try to save this as they are replaceable and nearly impossible to preserve. Step Two: You should be able to pull one side of the window out of the opening. On the side you will see the cords (D)that hold the weights. Be very careful if you intend to use the weights again as they are very heavy and may drop taking the cord with them. Once you have removed the cord tie it in a big tight knot so as not to loose the cord inside the frame. Step Three: The upper wood stop is going to be much more difficult because it is not nailed to the surface of the wood but actually tucked into a slot within the frame. Use your utility knife to separate the paint from the stop and the upper window sash. You are bound to do a little damage removing the stop but if you start in the middle with a flat screw driver hopefully the damage will be minimal as you are prying it out. Step Four: Again, use your utility knife to separate the paint from anything that may making removing it difficult. Lower the window and remove the metal guide. Swing the window out and remove the cords, tie them as you did in Step two. If you are putting in new windows you may want to remove the weights and fill with insulation. Removing the trim 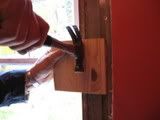 The window is out...inside view  Outside view 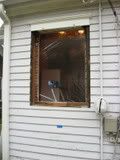 There is no stopping now. We removed the siding. I have to admit I almost felt like stopping my brother. Oh, and look at that wood underneath the siding. The black stuff is just dirt but the wood is gorgeous. One thing I want to add: You never know what electrical wiring may be running through an old house so we just cut layer by layer rather than just take a   and cutting throught the whole wall. 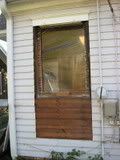 And something interesting...notice the metal that is in there. Anyone know what the heck that is. We tossed around the idea that somehow it may be a grounding thing??? Added note: I think I found out what that is. I think it was used so the plaster people would know how thick they were laying the plaster and they called it a "grounding". Someone correct me if I'm wrong.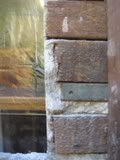 And the biggest bonus of all was finding a little order sheet that was for the original builder or roofer. The paper is all curled up and very brittle but now I know who at least had a part in building my house. I'm going to try to unfurl the order sheet so I can post it. Not that anyone cares but I think it is cool to find a little history of ones home.
|
|
|
|
Post by Tumbleweed on Nov 6, 2007 1:51:10 GMT -6
As soon as I finish posting the finished door I'll get on with step-by-steps to building the ramp.
|
|
|
|
Post by tridlette on Nov 6, 2007 11:27:06 GMT -6
Was that the original window? My thought looking at the picture is that it might have been from a previous window frame, and was cut when a larger window was put in.
I found a newspaper in the wall for insulation in my first home, that was dated 1913. There had been a door to the outside, but they closed it up, and put the siding right over it on the outside, but the inside door was still in place in 1986 when I tore apart that kitchen. One thing learned, never try to renovate a 19th century home using a carpenter's square! Nothing was even CLOSE to square! Plus the ceiling was so low, that I couldn't replace the exterior door with a standard door. I had to buy solid wood and cut it 5 1/8" short to fit the opening.
Back to the subject of Handicap Ramps. My dad has built a ramp from scratch, that he only attaches to the house when my brother is coming for a visit. I'f you are still looking for ideas for a "temporary" type attachment, I'd be happy to ask him for his drawings. He met local code and probably exceeded it, since he is an engineer and so is my brother... DH was a safety engineer, so with the 3 of them planning, they got very involved in the railing specs and side walls, etc. Let me know if you want me to track down the plans!
Laurie tridlette at comcast dot net
Edited this post to change the title.
|
|
|
|
Post by Tumbleweed on Nov 6, 2007 13:44:23 GMT -6
Tridlette,
I'm pretty sure that is the original window as it is exactly like all the rest in the house.
I'll PM you about the plans. I imagine those plans are top notch since there are engineers involved and what a great thing to do...make a ramp for a visiting relative.
I love you found an old newspaper in your wall. I'm a nut about watching that T.V. show "If walls could talk" so any little thing I find around/in my house I'm tickled pink. My house has a really interesting history. One of these days I'll post about it but I have to verify some of the facts first.
|
|
|
|
Post by Tumbleweed on Nov 6, 2007 21:24:27 GMT -6
|
|
|
|
Post by smcartor on Nov 11, 2007 0:51:24 GMT -6
Hey tumbleweed!
How is the ramp installation going. Winter is getting ready to set in...are you going to get it done before the snow flies?
|
|
|
|
Post by Tumbleweed on Nov 11, 2007 1:32:49 GMT -6
Yup, sure am. It will be a peice of cake after that door. In fact I think we'll get it done tomorrow. If we start running out of time we will leave putting on the slats on the ramp for me to do and the inside trim around the door.
We only have to build 12 foot. The other part is prebuilt so it is a matter scooting it in place on the footers.
Wish us luck!
|
|
|
|
Post by barb on Nov 11, 2007 10:48:28 GMT -6
Wishing you luck!
|
|
|
|
Post by smcartor on Nov 11, 2007 15:06:52 GMT -6
Ditto!
|
|
|
|
Post by Tumbleweed on Nov 11, 2007 18:36:52 GMT -6
Well, I was very optimistic that we would get further than we did. But these old houses are tricky. We had to fiddle with the door some more because neither one of us was totally happy with some things. A trip to the Home Depot set us back and you know there is always something you need or forgot.
I'll post some pictures of the process and the things we did but I'm pretty pooped right now. Maybe later tonight.
|
|
|
|
Post by Tumbleweed on Nov 15, 2007 1:33:17 GMT -6
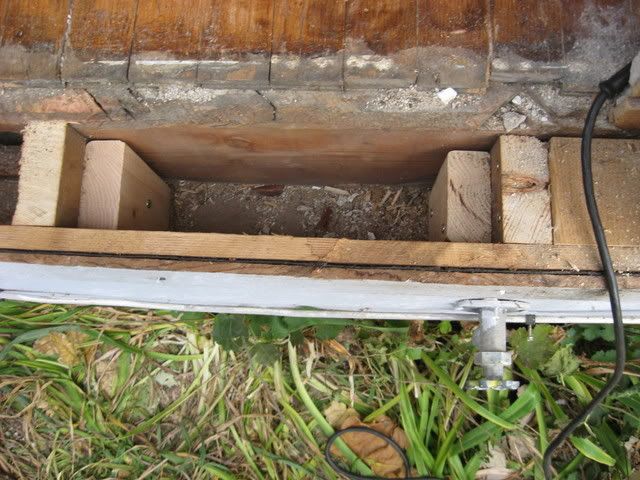
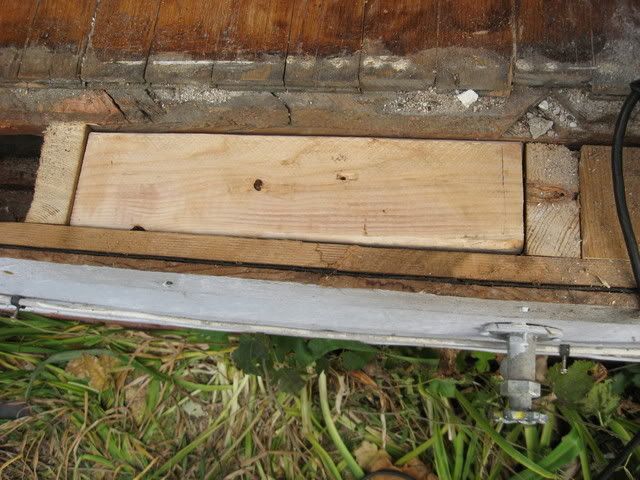
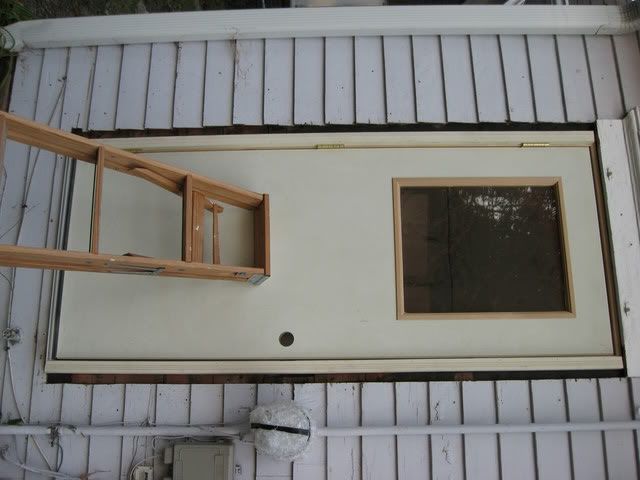
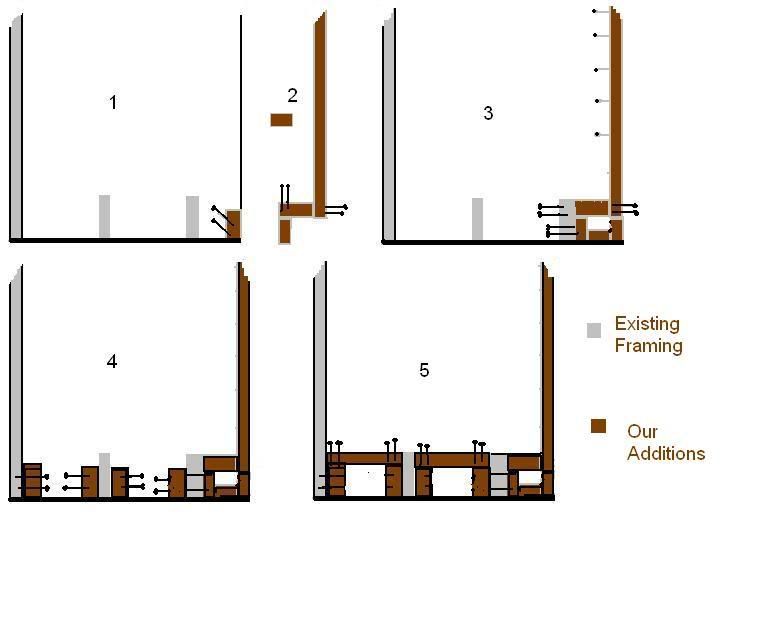
O.K. Back to the window. One of the little glitches we ran into after we made the opening from the original molding down to the level of the floor was that we needed a solid threshold and laying a piece of wood right on top would have made the height of the opening too short. The other option would have been to cut into the molding on top and remove the headers so we'd have more height. I suggested to my brother we make little upside down-U- shaped inserts out of 2x4's that would be flush with the existing 2x4's. He liked the idea (woo hoo) and so thats what we did. Sometimes you have to do things differently with these old houses. Here's a rough little illustration on how we did it making sure each 2x4 was securely screwed in. You can click on any image to make it larger.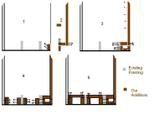 Here are some real life photos: 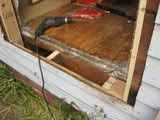 Don't worry...I stopped my brother before he went any further so I could vacuum that out.  He was kind enough to humor me. 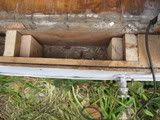  And the door is in!!! Not a beautiful door but an outside door that opens to the outside with a window. Geeze, I can't believe the paint is already pealing on this house. Only 5 1/2 years ago I had it painted.   |
|
|
|
Post by smcartor on Nov 26, 2007 14:20:07 GMT -6
How is the ramp building going? I'm curious what steps you have taken since your last post.
|
|
|
|
Post by Tumbleweed on Nov 26, 2007 17:13:59 GMT -6
I have tons of pictures and the steps we went through to build the ramp. Now finding time to get my thoughts together and post it is another story.
|
|


 Click for a bigger pic


 He was kind enough to humor me.